Soilpunk
technical rider
In these slides we'll guide you through installing, setting-up and uploading the HTML files to the ESP32 modules. We've already uploaded the correct firmware on the modules, so we're focussing just on getting the HTML on there.
This document is viewable as a webpage or as a slideshow
We'd suggest you set up one or two computers this way before the workshop, so that the participants can focus on the storytelling aspects of the workshop.
We will following these steps:

Add ESP32 boards
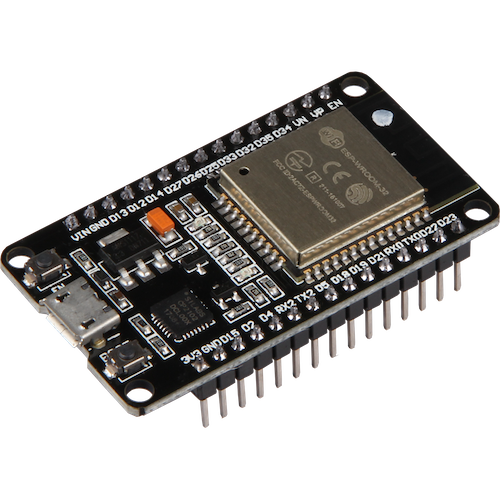
To create the Wifi hotspots we use ESP32 development boards. The Arduino IDE does not support these by default, so we have to add them to the IDE.
Adding ESP32 boards to the Arduino IDE's board list.
Open the Arduino Preferences under Edit > Preferences (Linux and Windows), or Arduino > Preferences (Mac).
Copy and paste the following into 'Additional Boards Manager URLs' and click 'Ok'.
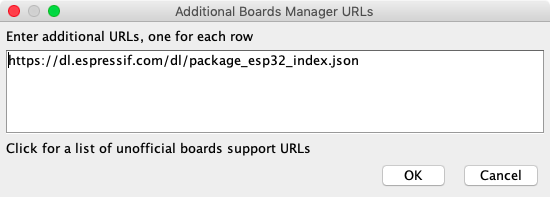
https://dl.espressif.com/dl/package_esp32_index.json
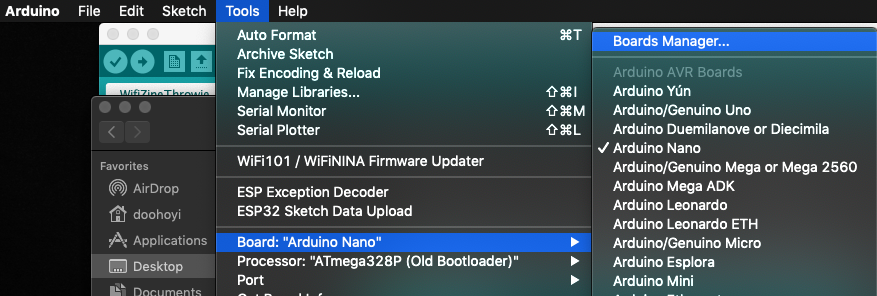
Launch the Board Manager
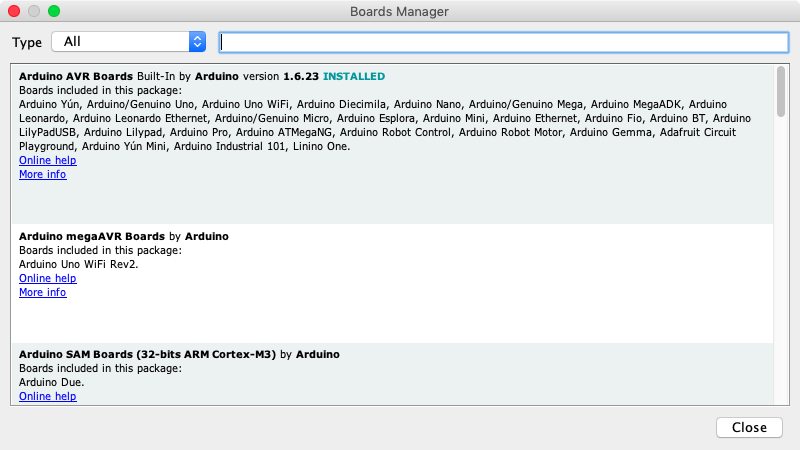
Search for ESP32

And click "Install"
If everything went well, you should now see an option to select "ESP32 dev module" in the menu under Tools > Boards.
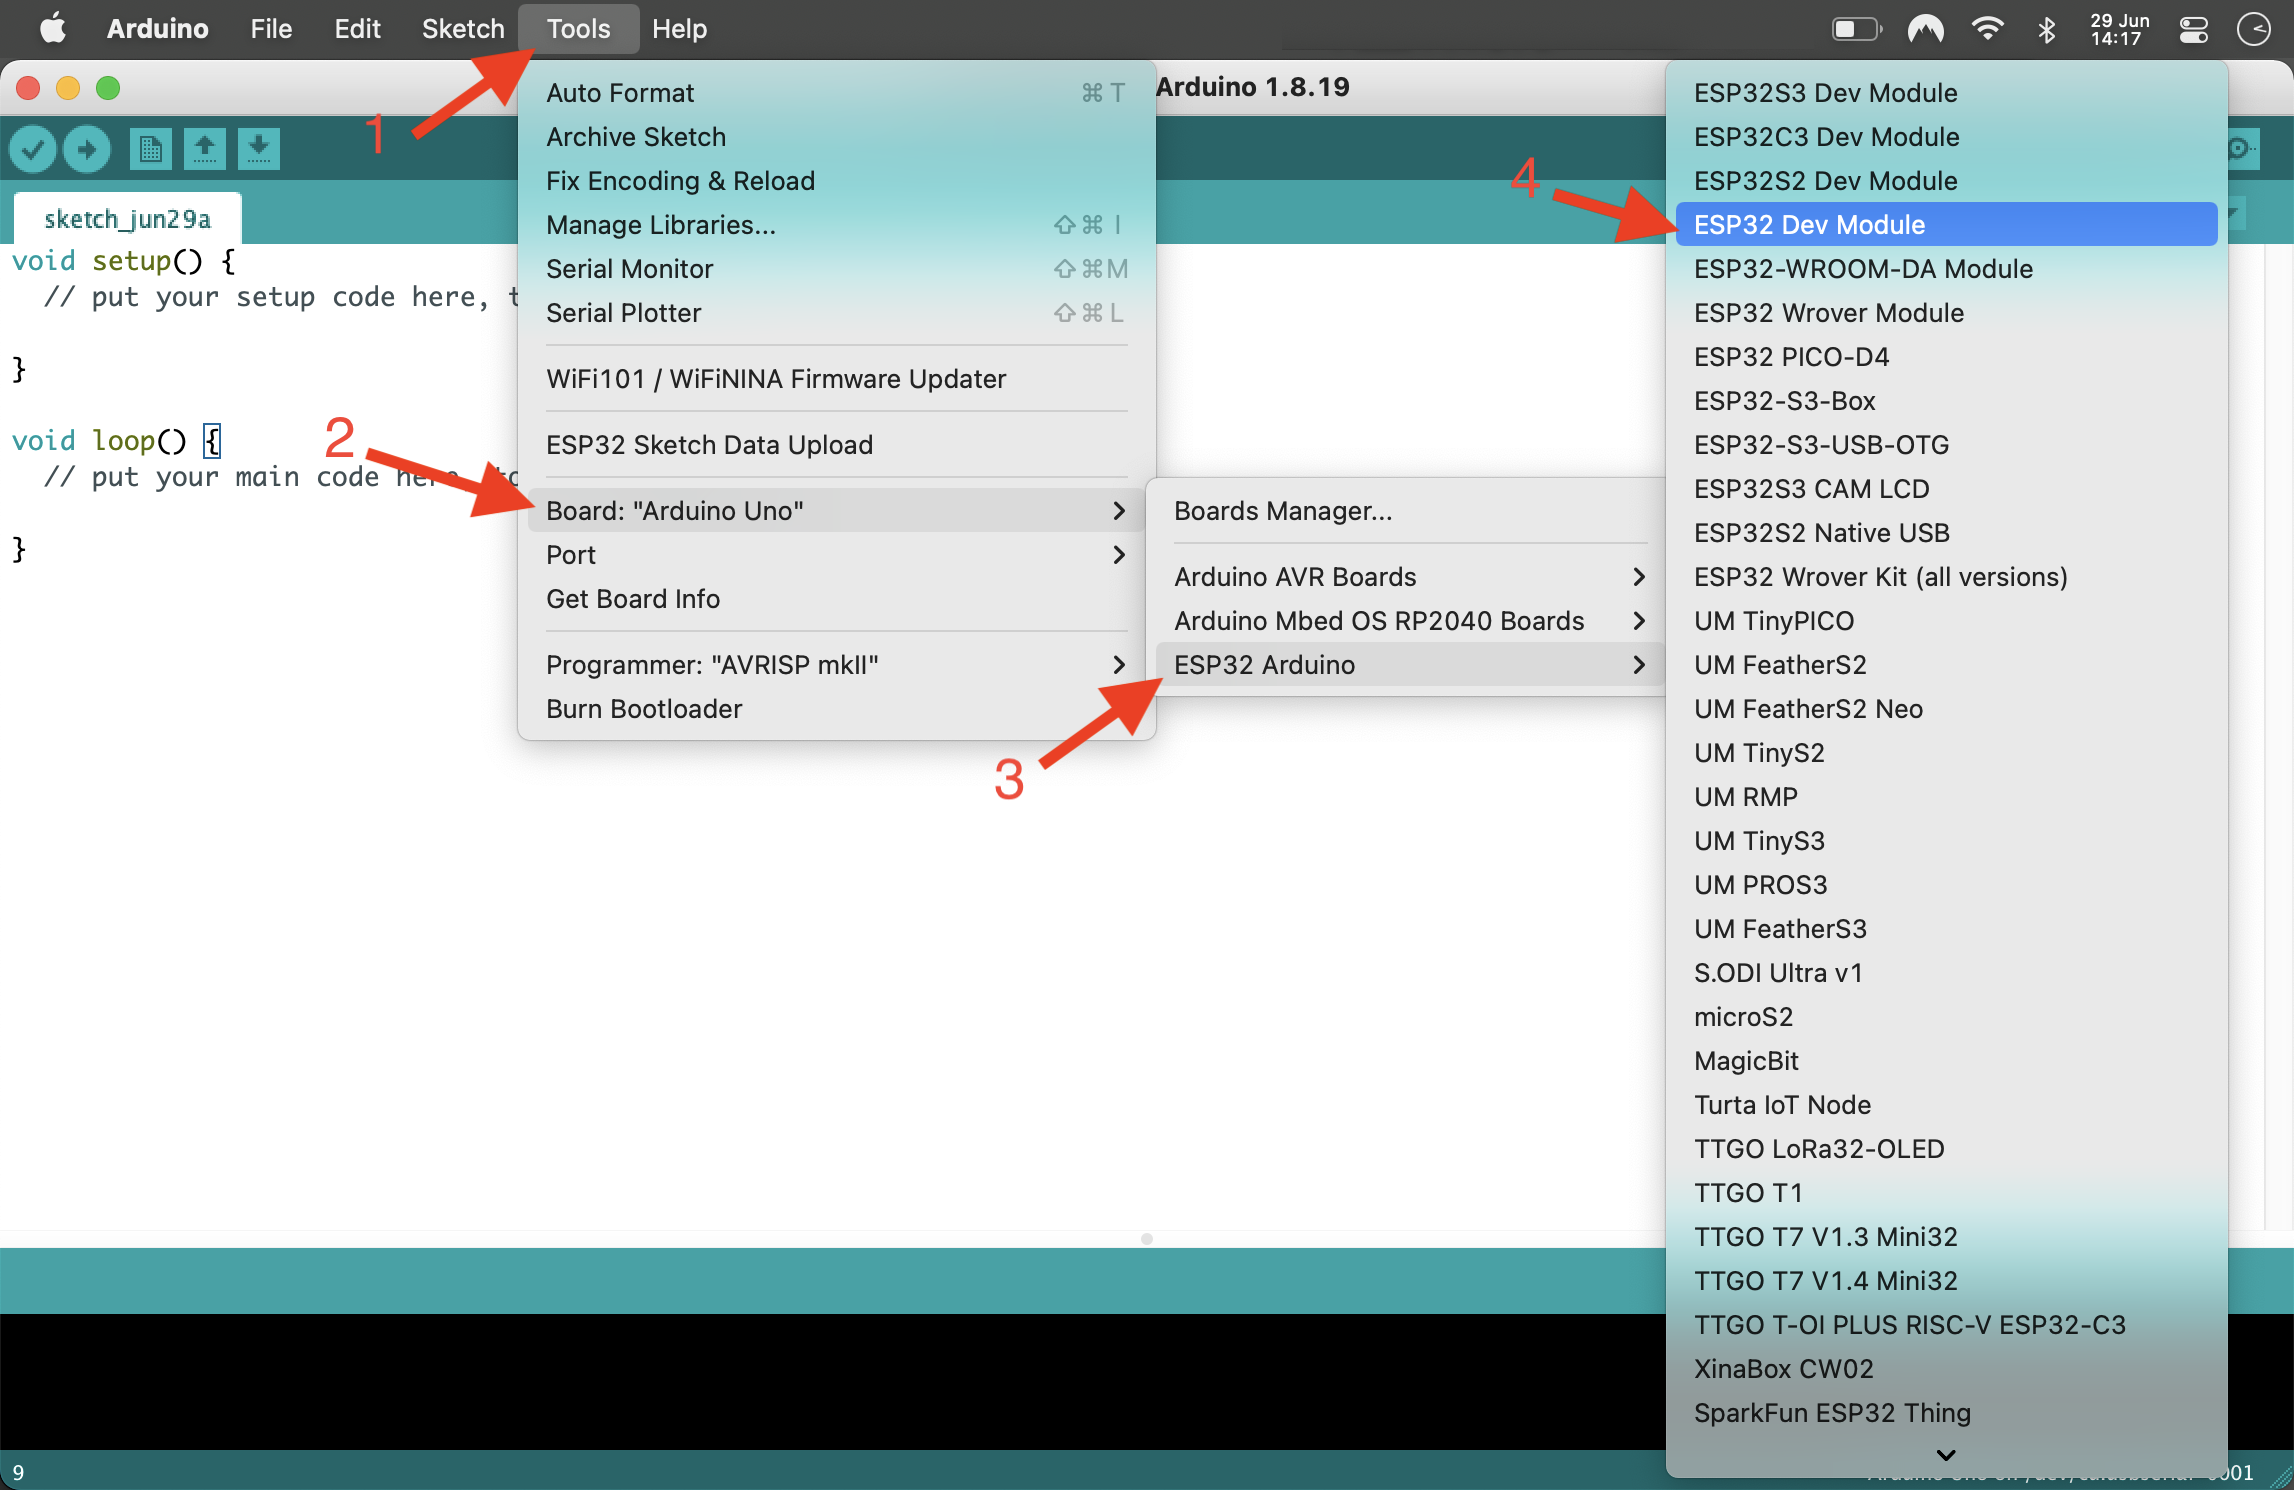
Select it, by clicking on it. All the other settings that appear should be correct by default.
Install the ESP32 driver
On most systems the ESP module needs a USB driver to be able to communicate with your computer. (chip name: SiliconLabs CP2012).
Linux driver
Linux 3.x.x & 4.x.x
- Driver installation not required (included in kernel)
Linux 2.6.x
- Linux 2.6.x - No information
Restart your computer.
Windows driver
Restart your computer.
Mac driver
Download the driver: Silabs USB communication chip driver download
For very old versions of MacOS (Yosemite/10.10.x) a legacy driver must be installed, instead normal one. Download Legacy SiLabs driver
Doubleclick "Install CP210x VCP Driver.app" to install it.
When it gives a security message, follow the instructions to allow the install to continue.
Restart your computer.
Gatekeeper (MacOS)
After restarting, make sure GateKeeper does not interfere with driver loading.
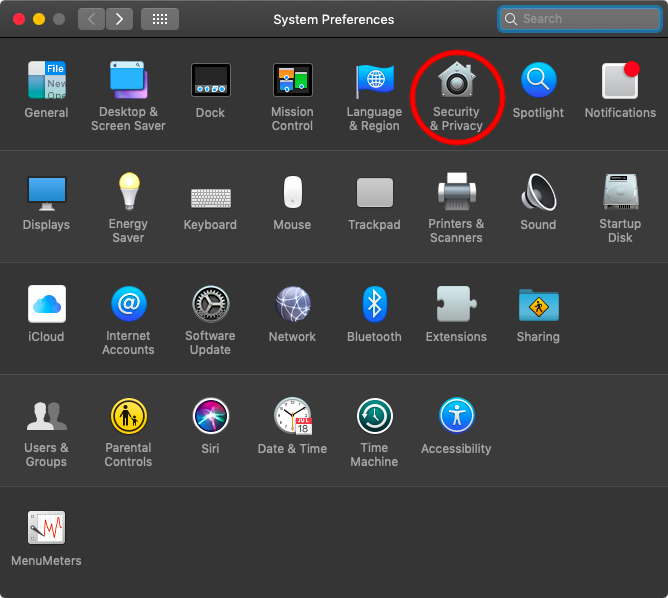
- System Preferences -> Security & Privacy -> General
Gatekeeper (MacOS)
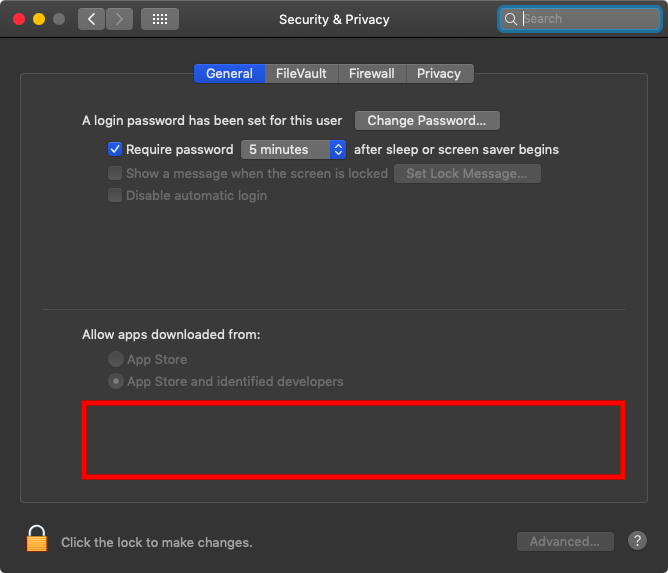
If there is an error message in the red box area, GateKeeper is interrupting the driver's operation. If this is the case, click 'Allow' and confirm with administrator password, then restart your computer.
Check driver
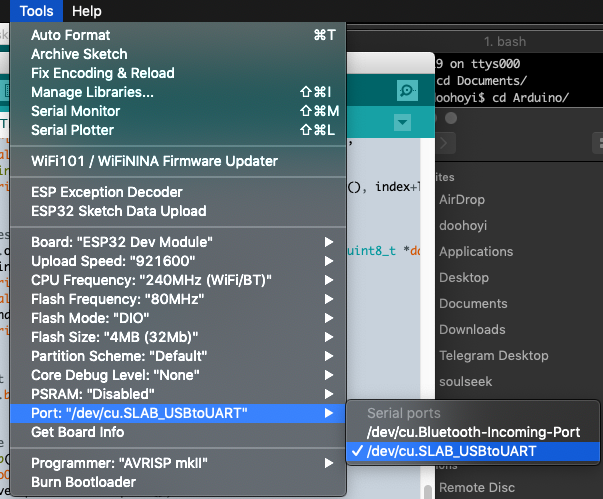
After starting the Arduino IDE, make sure it can communicate with the ESP32 module
If communication is possible, there should be a new entry in the port list as shown in the picture below. On MacOS it will be called something like /dev/cu.SLAB_USBtoUART, on Windows it will be COMx (where x is a number), and on Linux it will probably call /dev/tty_something.
Install SPIFFS plugin
The content of the small webpage we will put on the wifi modules is stored separately from the running code that takes care of publishing it. Therefore, it goes through a separate process from the usual Arduino IDE code upload process. To do this, you need to install a separate extension plug-in.
Download and install the ESP32FS plug-in
Then create a folder called:
- <home_dir>/Arduino/tools (Unix)
- My Documents\Arduino\tools (Windows)
- ~/Documents/Arduino/tools (MacOS)
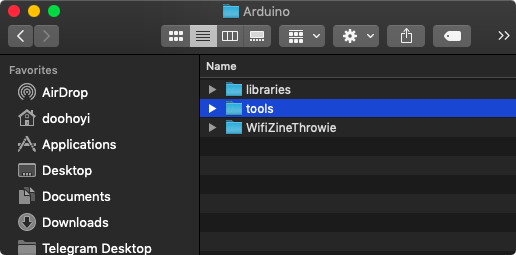
Copy unpacked ESP32FS into the subfolder tools
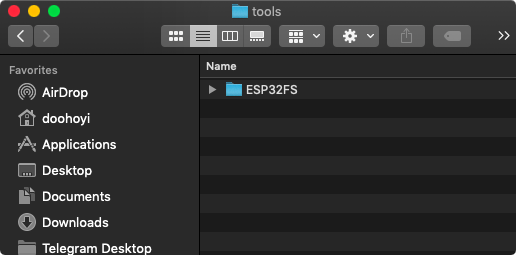
Be mindful with the construction of the folders. It should be installed as shown in the following figure. (Note also that the folder name is ESP32FS!)
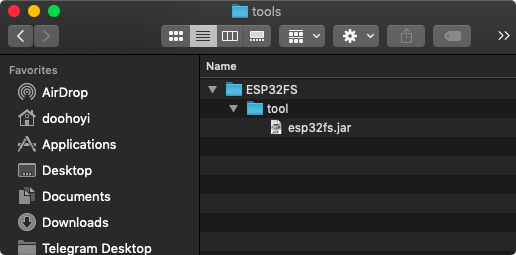
The final structure should be something like:
.../Arduino/tools/ESP32FS/tool/esp32fs.jarz
After restarting the Arduino IDE, verify that the plug-in installation was successful. If successful, you will see a menu called ESP32 Sketch Data Upload added.
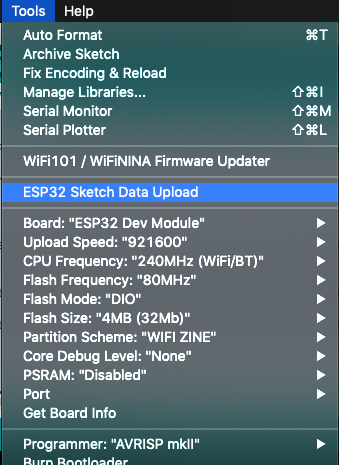
Make sure you have the WifiZineThrowie sketch open. When you click the ESP32 Sketch Data Upload menu option, it will move all the files in the /data folder to the ESP32 module's web page store.